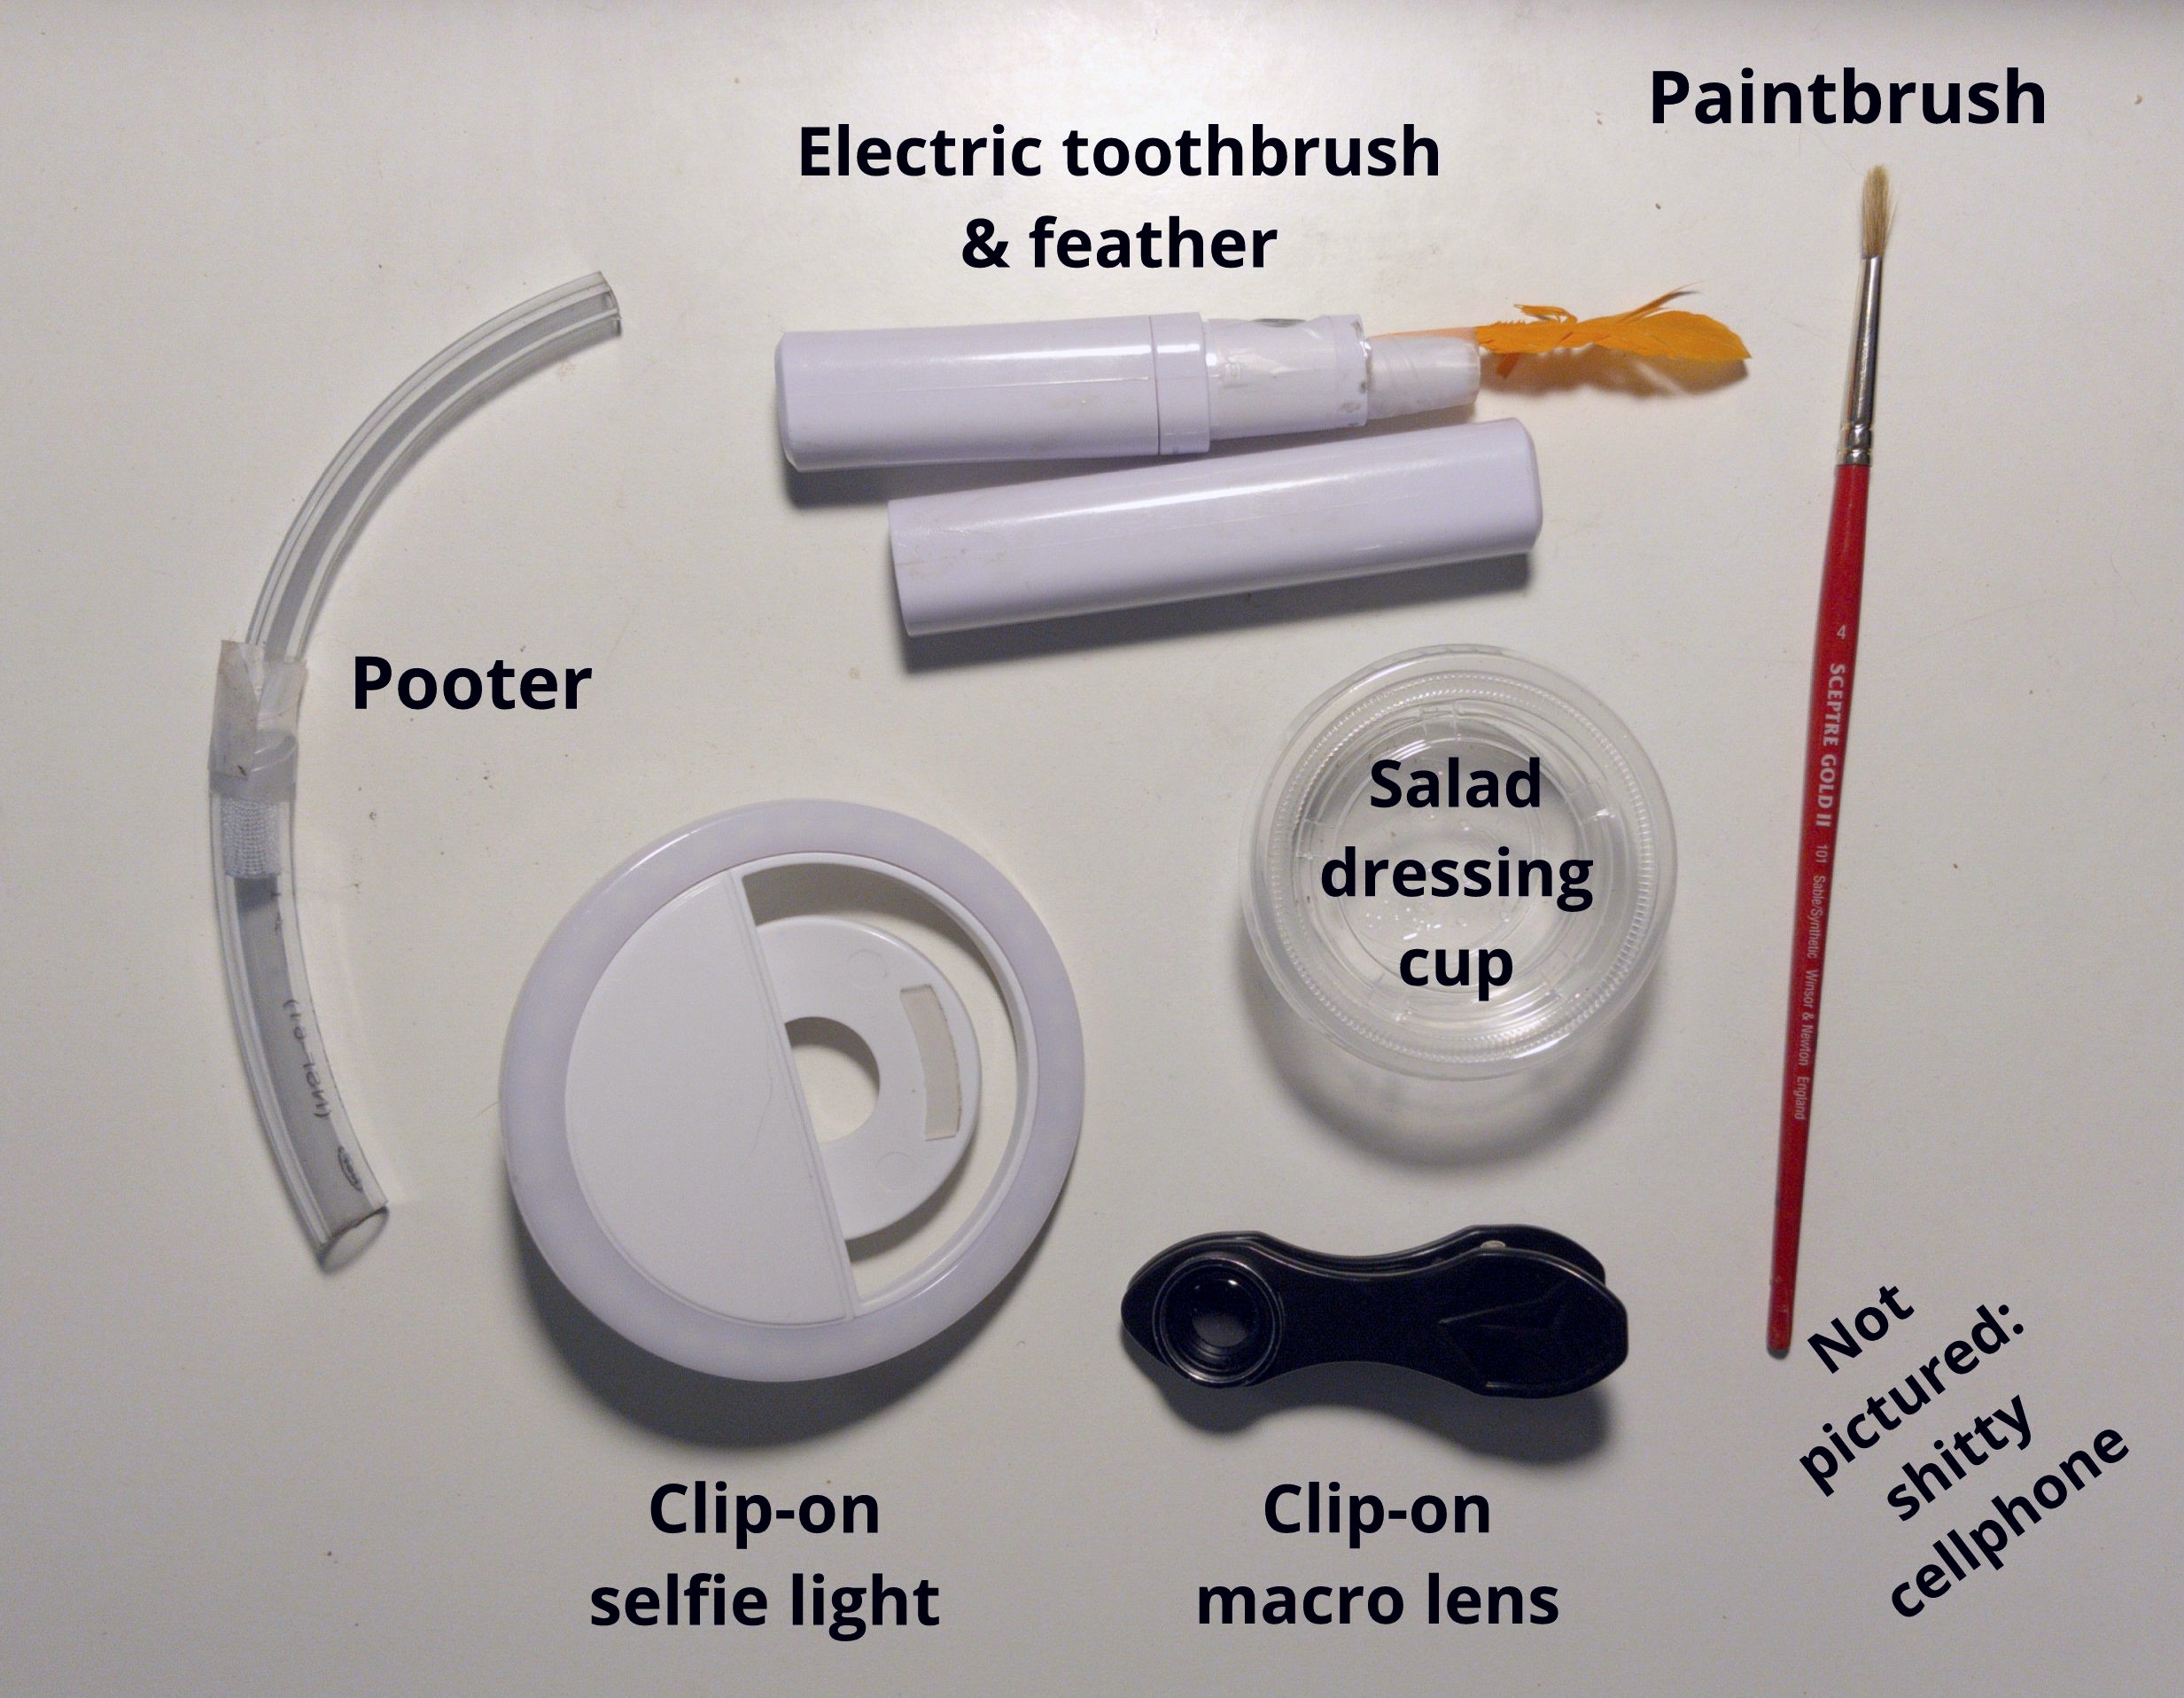
You don’t need a DSLR, professional science equipment, or even a really expensive smartphone to get up close with spiders (or any other bugs). I’ve been using my cheap-ass smartphone and gear cobbled together from the dollar store for years. So, here’s what I’m using right now, as well as some recommendations for other stuff I’ve used in the past.
Note: none of the product recommendations are sponsored, I don’t get any kickbacks, your mileage may vary, etc. This is just what I’ve found useful over years of trying a bunch of cheap shit and seeing what works for me personally.
Equipment
Spider-wrangling
- a pooter for capturing small spiders/bugs. Also known as an aspirator, but why would you call it an aspirator when you could call it a pooter?! It’s basically a straw with a filter, so you can suck in small insects without actually eating them. This design uses plastic tubing and a piece of pantyhose, but here are some other designs. Once the spider/bug is captured, you can easily transfer it to…
- a catch cup (like this plastic salad dressing cup) in case you need to capture and transport a spider. I poked holes in the lid with a pin, but spiders don’t need much air, so for a quick trip you don’t even have to do that. Film canisters and pill bottles also make good catch cups.
- an electric toothbrush. Turn on, touch to web, spider thinks it’s a fly, spider comes out. Mine is a battery-powered travel one bought from Shoppers Drug Mart years ago; it’s nice and small and has a cap. I use a feather, but other people use a piece of zip tie or just the normal toothbrush head. I’ve also heard of people using vibrators, but it’s a lot weirder to whip one out in public.
There is much discussion among arachnologists about which kind of vibrations work for which species. I mostly use the toothbrush with hacklemesh weavers (Amaurobiidae) and funnel-weavers (Agelenidae), but have found it also works for cobweb spiders (Theridiidae). - a small paintbrush. This can be used to gently boop spiders, but you can also just mush the bristles down on a small spider/bug to pick it up. It’s like tweezers or tongs, but much softer and finer, so the animal doesn’t get hurt. I’ve used a paintbrush to transfer fruit flies to webs.
Photography
- a cell phone macro lens. I got this longboi from Apexel because on Motorola phones, the camera is like way down in the centre of the phone and standard clip-on lenses (like this Kikkerland kit) wouldn’t fit my phone. If your phone’s camera is in a normal place, the world’s your oyster.
When I started out, I used the Easy-Macro Cell Lens Band, which is also a great option. The band wears out after a while, but you can just put the lens in a thick rubber band with a small slit cut into it. If you’re feeling crafty, you can use the lens from a laser pointer and make your own mount/clip. In a pinch, you can take photos through a magnifying glass, or even put a drop of water over the camera lens.
One problem with clip-on lenses is that they usually cover the flash. That brings us to… - a light. In my experience light is the key factor in turning a crappy photo into a good one. Currently I’m using this rechargeable clip-on selfie light from Kikkerland. You can also use portable lights from the hardware store, a headlamp, a bike light, etc. There are also camera apps that let you use the flash as a flashlight with the camera running—see the next section.
Phone & camera app
If you have a decent, newish smartphone, you’re good. If not, there are still ways to get around your phone’s limitations. My current phone is the Moto G5 Plus, a “budget” smartphone from 2017. To take better-looking photos, I use, among other things:
- a mod that enables the Android Camera2 API, which gives apps much more control over the camera. Most newer or higher-end phones will already have this enabled. However, not all camera apps have these features, so you may need to install…
- a camera app like HedgeCam 2. Basically a slightly more usable OpenCamera, it has lots of useful features, like manual focus, using the flash as a flashlight, photo bursts, etc. There are also unofficial versions of the powerful Google Camera app you can install on non-Google phones.
- apps for editing, like Snapseed and Simple Gallery Pro. (I added the text in the featured image using Simple Gallery Pro.)
Now you’re ready to go! For tips, see Sebastian Alejandro Echeverri’s workshop on smartphone photography from the recent AAS conference. He goes into more detail about how to work with the limitations of smartphone photography and the range of accessories available.
